• Home
  • Games
    • Crystal Brawl
    • Don’t F**k Up
    • Nika
    • Whiskers
  • News
  • Team
  • About
  • Presskit
  • Friends
  • Contact
Studio Mercato

Monthly Archives: January 2014

Global Game Jam 2014 Roundup

Posted on January 29, 2014 by Ben

This year, a bunch of us Mercatoites participated in the Global Game Jam, the world’s biggest simultaneous game jam! The GGJ holds special significance for us since the team first came together at last year’s event where we made the bacon-oriented platformer Gird Up Your Loins.

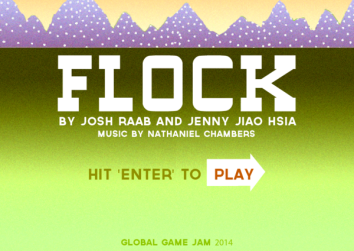
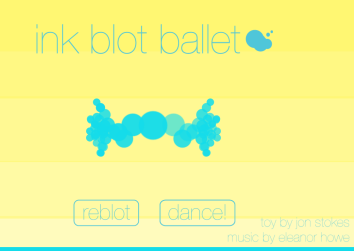
The theme for this year’s jam was, “We don’t see things as they are, we see them as we are.” Based mainly out of NYU’s jam site at their Brooklyn campus (with Nathaniel contributing from LA), Mercato folks in various teams ended up working on six games – one of them even won an award!

Here’s the final tally:

Nyoncat and Bleuteuth Flock Ink Blot Ballet
Nyon and Bleuteuth live in a world of neon lights. Control the environment around them as you choose the paths they take. Will Nyon catch Bleuteuth and knock his lights out, or will Bleuteuth escape to shine another day? The choice is yours! Flock is adorable. I can’t really say anything more without spoiling it. A random Rorschach physics dancer generator.
By Mark Anderson, Anthony Conta, Chris Hernandez, Yury Pavlotsky, Ben Serviss, Neil Sveri By Josh Raab, Jenny Jiao Hsia, Nathaniel Chambers By Jon Stokes, Eleanor Howe
Official Jam Page Official Game Page Official Jam Page
Play Now! Play Now! Play Now!
 
Ant Simulator Prototype Thing Harmony Couch Surfing
Simulating what it might be like to experience the world as an ant, where everything you know about the world comes from pheromone trails left behind by your colony mates.
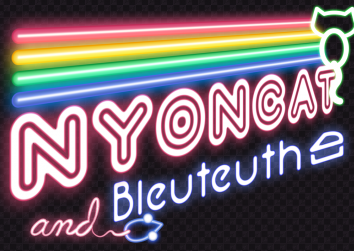
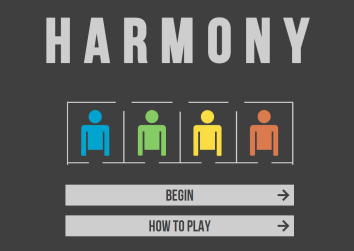
**Winner for Best Visuals at the NYU game jam site!**
You are the leader of a cult. The world is going to end in 10 days. You must recruit as many true believers as possible! Sometimes, when people keep assuming you’re something you’re not, when the same old routine starts weighing you down, the only way to find yourself is to take a chance on something crazy.
By Chris Hernandez By Nick Robalik, Nathaniel Chambers, Joe Kowalski, Mike Lazer-Walker, John Bujalski, Chris Wolf, Erwin Perez By Ben Serviss
Official Jam Page Official Game Page Official Jam Page
Download Now! Play Now! Play Now!
Posted in Events | Tags: global game jam, prototypes | Leave a comment |

How to Build an Indie Arcade Cabinet

Posted on January 15, 2014 by Jon Stokes

Back in July of last year, Studio Mercato was offered an opportunity to exhibit our game Crystal Brawl on an actual freaking arcade machine in a charming, tatted-up dive of a music venue in Brooklyn called Death By Audio. The one caveat: we had to build it ourselves. Obviously we jumped at the chance, and thanks to the excellent Mark Kleback of DBA, construction kicked off in August and was completed the following December.

On December 7, we held an opening party for the Crystal Brawl cabinet and another cabinet, built by Dylan McKenzie & Friends, for their awesome minimalist sports game Field-1. We dubbed the event Deathmatch by Audio, and there’s a heartwarming account of the event over at Indie Statik.

We’re planning a Deathmatch by Audio II on January 31st (be there!), but in any case, both games will be on display at Death By Audio until the end of January.

IMG_0907

The finished product. Purdy marquee and control board art by Chris Hernandez.

In this post, I want to share with you my process of designing and building our arcade machine. This is a how-to, but I won’t be going into a ton of detail on every aspect of the build. Instead, I’ll share the wealth of super valuable links I amassed while building the cabinet.

If you have any specific questions, feel free to drop me a line at jon[at]studio-mercato.com. Let’s get started!

Design

First off, let’s talk about the game. Crystal Brawl is a 2v2 local multiplayer action/sports capture-the-flag hybrid in the same-ish genre as Hokra and Slash Dash. We needed controls for four players, and I wanted to go with three buttons per player, even through Crystal Brawl only uses two. I told my teammates we should do this to make the cabinet reusable, but the truth is I just wanted to be able to emulate (and pay homage to) NFL Blitz ’99, the defining arcade machine of my youth.

The cabinet needed to be modular for ease of transport, as we didn’t want to have to rent a U-Haul every time we wanted to move it. To this end we split it into three parts: top, bottom and control board.

Making it modular like this allows it to fit easily in a small SUV, or even spread across two taxi trunks, and having a separate control board affords us the opportunity to bring it to meetups or game festivals. The control board connects via USB, so it will work on any ol’ computer.

Print

The modular arcade cabinet design in three pieces!

Having a general idea of what we wanted to create, I set out to look for similar cabinet builds. You can find a plethora of detailed build plans for popular arcade machines at Jakobud.com, including Donkey Kong, Pac-Man, Q*Bert, and The Simpsons, the last of which I used as a reference for the four player control board.

Jakobud’s plans were helpful for general dimensions of many a cabinet, but eventually I found the even more useful LuSiD’s Arcade Plans.

LuSid’s was a step up because they showed the layout of each piece on 4’x8′ sheets of plywood, which made it easier to conceptualize every piece of the machine and how they would come together.

In the black and white diagram below, you can see the final profile mockup for our machine. Its depth from front-to-back is about 10″ less than similar cabinets that use CRT monitors. And, as you can see, it splits into top and bottom components. The rest of the pieces (not shown here) were kind of measured as I built, by constantly referencing LuSiD’s plans.

Materials

The total cost of the machine came out to $665 smackers, which was more than I expected, but a reasonable price for your very own arcade machine. The most expensive parts were the joysticks, I-PAC control board, computer and wood. Luckily we didn’t have to drop money on an LCD monitor or speakers since I already had those.

We also dodged a bullet with the plexiglass, which I used to cover the control board and the screen, and to hold the marquee in place. It would’ve cost around $100 for a 4’x4′ sheet, but I found one at Film Biz Recycling and there was no price marked on it. When I took it to the checkout to ask the cost, to my surprise, the nice lady quoted me only $3. Even after her colleague and I realized that she had originally thought it was a piece of cardboard, they didn’t want to go back on their word, so $3 I paid. Below is a list of everything that went into our cabinet.

CBCabinet-03

Diagram for the modular design.

The Electronics…

  • 4 Ultimarc Mag-Stick Joysticks
  • 14 Happ Classic Pushbuttons
  • I-PAC 2 USB PC interface, for joysticks and buttons
  • 20″ Dell 2000FP LCD Monitor
  • Dell Optiplex 580 desktop computer
  • Crappy old Insignia 2.1 computer speakers
  • LED Counter Light, for marquee
  • 18 gauge wire (I used speaker wire)
  • Crimp spade connectors, to wire up the buttons and joysticks
  • Keyboard, Mouse

The Wood & Hardware…

  • 2 4’x8′ sheets 3/4″ plywood or MDF
  • 4’x4′ sheet 3/8″ plexiglass
  • Wood glue, wood filler
  • 1 1/4″ wood screws
  • T-Nuts, to bolt top and bottom pieces together
  • Zip ties
  • Gallon of latex paint
  • Quart of Kilz primer

The Tools…

  • Jigsaw
  • Cordless drill
  • Standard spiral wood bits
  • Forstner or Masonry bits, for drilling plexiglass
  • 1 1/4″ wood spade bit, for drilling button holes
  • Carpenter Square
  • Measuring Tape
  • Wood clamps (Irwin quick grip style are the best)

Construction

I won’t go into a lot of detail about wood cutting and assembly, as there are good accounts of the process here and here. Don’t be afraid of the master wood-working techniques in that second link, like lots of router work and fancy joints. If you have a steady hand and you take careful measurements, you can get by with just a jigsaw and a drill.

Crystal Brawl arcade cabinet

The build begins. We turned Mark’s kitchen/living room into a woodshop for the evening.

Plexiglass is a very fickle mistress and you’ll quickly find she’s much less forgiving than wood. Regular drill bits won’t work because their angles are too aggressive – they’ll push right through just when you start to drill, and crack or chip the plexi.

You want to pick up some Forstner bits, or if you can’t find those, masonry bits. Drill slow and put a couple drops of lubricant on the tip of the bit before you begin. I used bike chain oil.

Also, remember to never take the protective covering off of plexiglass until you are finished cutting. It prevents scratches and reduces the likelihood of cracks during cutting and drilling.

For a simply grand article on how to wrangle plexiglass, the scrupulousness of which gives me goosebumps, see this.

Control Board

This was the most fun part of the project, maybe because I was able to awaken my long-dormant inner electrical engineer (I did plenty of custom car audio installations in college, so I missed playing with wires).

The brains of the control board is Ultimarc’s I-PAC2 USB interface, which lets you turn button and joystick signals into key presses on a keyboard.

The I-PAC2 is really meant for a two player control board, but because we have so few inputs per player, we were able to stretch it to work with four. Once it’s set up, you can plug it into any computer via USB and simulate a standard keyboard. You can use Ultimarc’s Interactive Panel Designer to lay out your control board and program key assignments for each of your inputs.

whatever

Crystal Brawl‘s layout in the Interactive Panel Designer.

Mounting the buttons and joysticks and wiring the control board will take way longer than you think, so pull up a chair, pour yourself a cup of coffee or beer and clear your docket for the next four or five hours.

IMG_0861

Mounting the inputs.

All of the buttons come with plastic nuts that tighten from the back and make easy work of mounting. The joysticks are tougher. Each joystick has six mounting holes, and most people drill down through the top of the control board and run carriage bolts (the ones with a smooth rounded top) through and secure them from the bottom. This is definitely the most reliable mounting method. Your joysticks won’t budge.

In my case, I wasn’t completely sure of the angles I had chosen for the two outer players’ sticks, as they seemed a little aggressive to me despite keeping in line with other builds. I wanted to be able to rotate them later if I decided they didn’t play right.

So on each corner, I used a flat washer, a lock washer, and a 3/4″ #8 screw, coming in from the bottom, that I knew wouldn’t penetrate the top of the surface. It turned out to be very sturdy, and my fingers are crossed that it stands up to heavy use.

arcade cabinet controller

The I-PAC in action.

For wiring, there are three terminals on the microswitches used for the arcade buttons and joysticks. On the I-PAC, there is a terminal for each assigned key press. You’ll want to run the Normally Open (NO) terminal on your button or joystick’s microswitch to its corresponding input on the I-PAC. Then you just daisy-chain all of your grounds together and connect them to the ground input on the I-PAC. You’ll never use the NC terminal on your buttons, so you can effectively ignore it. For more info on wiring, bada bing.


Creating a Self-Sustaining Machine

Any computer that’s going to be used as part of an exhibition needs to be able to handle tasks like automatically restarting once a day and rebooting if the game or program crashes. In our case, there also needed to be macros for restarting the game and restarting the computer itself that are accessible by button presses on the control board, so you can reboot the game without having to reach around behind the machine and access the computer.

IMG_0855

The control board.

And so, on the Crystal Brawl cabinet, there are two super-user buttons hidden on the side of the control board. One is meant to restart the game, and one restarts the computer. Each one triggers a keyboard shortcut that activates a script to accomplish its task. I used AutoHotkey, an amazing piece of software for Windows that lets you automate all sorts of tasks like user input, opening and closing documents, file and folder manipulation etc.

Because Crystal Brawl is an HTML5 game, it runs in the browser. The script to restart the game also starts the game. In a nutshell, it closes Chrome, then reopens Chrome to a specified link where our game is publicly hosted, and then puts Chrome into full screen mode. This script is activated by pressing the restart game button on the control board.

Here’s what it looks like:

#SingleInstance Force
SetTitleMatchMode 2
WinClose Google Chrome

Run https://whereever-your-game-is-hosted-on-dropbox.com

WinWaitActive, Google Chrome
Send, {F11} 

A second script, which boots automatically when Windows starts, constantly checks to see if Chrome has crashed, and if it has, it runs the Restart script. Crystal Brawl crashes pretty infrequently, but when you have a game up and running 24/7, you need to have these kind of precautions to make sure it runs smoothly.

This script is a little hacky (in a fun way!) as I couldn’t access lower level info in Chrome via AutoHotkey to be notified when it crashed. It works by taking five color samples every three seconds. If they all match the background color of the famous “Aw, Snap” Chrome crash screen, it restarts the game.

Here’s a peek at the script:

#SingleInstance Force
CoordMode, Pixel, Screen

;;sample a few points on the screen to see if they match the color of the chrome crash screen
Loop {

	sleep, 3000

	Loop,5 {

		y := a_index * 100
		PixelGetColor, Color, 100, %y%
		;MsgBox Color: %color%.

		;;background color on chrome crash page - 0x403023
		if (Color != 0x403023) {
			break
		} 

		if (A_Index = 5) {
			sleep, 3000
			Run C:\Users\User\Desktop\restartCB.ahk
			sleep, 10000
			break
		}

	}

}

For more tips on how to keep your installation up and running around the clock, check out this guide for Windows, and this one for Mac.

And that’s about it! It took a lot of time, but the payoff was totally worth it.

If you are planning your own build and you want to have a chat, please shoot me an email at jon[at]studio-mercato.com or hit us up on Twitter at @StudioMercato!

Building the arcade

Me with my masterpiece!

Posted in Crystal Brawl, Development, Events | Tags: arcade, Brooklyn, cabinet, construction, electronics, hardware, New York | 1 Comment |

Voyage to MAGFest!

Posted on January 10, 2014 by Ben

MAGFest was amazing! We shoved the Crystal Brawl cabinet and a huge tablet for Nika in a minivan and trekked down to DC for a weekend of what can only be described as ABSOLUTE GAMING ANARCHMADNESS (but in a good way).

Cramming the Crystal Brawl cabinet into the van!

Cramming the Crystal Brawl cabinet into the van!

The free-play arcade floor, the console library with every game imaginable that you can check out on demand(!), the tournaments, the concerts, hanging-out-with-other-awesome-indie-devs – this was one of the most fun game events ever.

Crystal Brawl at MAGFest

Nika on the big screen!

Nika on the big screen!

2014-01-02 22.11.39 small

IMG_1361 small

Final Stage concert!

IMG_1360 small

A small chunk of the massive console library – including some poor soul playing ET for Atari!

IMG_1410 small

After hours Nika Analog in the hotel room!

Posted in Crystal Brawl, Events, Nika | Tags: arcade, concert, magfest | Leave a comment |

Recent Posts

  • Best Essays for Academic Excellence Top-Quality Writing Services
  • Starting from $10 80 per Page Trusted by Students
  • The Best Essay Writing Services Reviewed: EssayPro, PaperWriter, and WritePaper
  • (no title)
  • Write My Essay For Me Essay Writing Service by PapersOwl com

Recent Comments

  • Zequek Estrada on How to Build an Indie Arcade Cabinet
  • Matthew Kelly on Crystal Brawl Playtesting

Archives

  • June 2025
  • May 2025
  • April 2025
  • March 2015
  • February 2015
  • January 2015
  • December 2014
  • September 2014
  • August 2014
  • February 2014
  • January 2014
  • November 2013
  • October 2013
  • September 2013
  • August 2013
  • July 2013
  • February 2013

Categories

  • Awards
  • Business
  • Crystal Brawl
  • Development
  • Don't F**k Up
  • Events
  • Nika
  • Press
  • Uncategorized

Pages

  • About
  • Contact
  • Crystal Brawl
  • Don’t F**k Up
  • Friends
  • Games
  • Home
  • News
  • Nika
  • Team
  • Whiskers

fddsfsdgsd

  • Best Essays for Academic Excellence Top-Quality Writing Services
  • Starting from $10 80 per Page Trusted by Students
  • The Best Essay Writing Services Reviewed: EssayPro, PaperWriter, and WritePaper
  • (no title)
  • Write My Essay For Me Essay Writing Service by PapersOwl com

CyberChimps WordPress Themes

© 2019 Studio Mercato